Week 5: Animation Blueprints

This week I tried out using animation blueprints to create lighting that can be triggered by the avatar’s animation.

I set up lights with a trigger box that once hit the R, G, B will randomly generate a different color.

I set up lights with a trigger box that once hit the R, G, B will randomly generate a different color.

I set up a capsule collision on the avatar’s hand. So once the capsule encounters the trigger box, the light will change color.

I set up a capsule collision on the avatar’s hand. So once the capsule encounters the trigger box, the light will change color.

The point light looks great in metal box.

The point light looks great in metal box.

Here is a weird metal dance of all the avatars I have in my individual scenes:

I also tried out bringing my motion capture data to AR in Unity using Vufuria:

Week 4: Movement for Motion Capture

MOTION CAPTURE LAB DOCUMENTATION:

Project: Data Cleaning and Retargeting

Date: 2019.09.28 4 p.m.

Location: NYU Black Box Theatre

Participant: Yundi Jude Zhu, Chaoyue Huang, Dana Elkis, Chester Ma

Goals:

  • Find a partner or two (or 3 or 4). Review all videos before coming into the Black Box. Each group come up with 3 different scenes. Each scene must either have a restriction in the virtual world that must be dealt with in the physical world OR a skeleton must reveal part of its character (it has hip issues, it’s moving through a dense forest, it’s 3 years old, it’s part of the Royal family, half of its body is filled with helium, etc). Document the experience. Record & export the scene to bring into Unreal for further documentation.

Steps:

  • Get motion capture record and clean the data

  • Make 3D model with MakeHuman

  • Get model rigged with Mixamo

  • Sync motion capture data with 3D model and export as .fbx

  • Use the data to make animation in Unreal

Motion Capture and Data Cleaning

Glad that we invited Lynn from CS program to be our performer again. We separate our roles as follows:

Performer: Chaoyue Huang, Lynn Li

Director: Dana Elkis

Motion capture technician: Chester Ma

Video documentation and production: Yundi Jude Zhu

Key Notes:

  • We are the last group got in the lab that day. Probably because of that, the cameras are sensing a lot of ghost markers, which make the data cleaning very difficult. We spent entire Saturday 6-9pm and Sunday 2-6pm (7 hours!!) at the Black box theatre to clean the data.

  • Make sure the interaction is necessary and as simple as it could be. Any intersection and overlapping will cause gaps between the data.

  • Also, it’s important to make each take as short as possible. 15 seconds should be maximum.

  • When cleaning the data, I found that deleting some rapid curves and auto fill the selected section with smoothing will help a lot.

  • Always have a video reference!

Chaoyue is getting dressed. We are the last group got in the lab that day. Probably because of that, the cameras are sensing a lot of ghost markers, which make the data cleaning very difficult. You can see from the projected screen that Chaoyue’s he…

Chaoyue is getting dressed. We are the last group got in the lab that day. Probably because of that, the cameras are sensing a lot of ghost markers, which make the data cleaning very difficult. You can see from the projected screen that Chaoyue’s head was not positioned right.

Scene 1: Cliff climbing

In this scene, Chaoyue is climbing the cliff and trying to reach Lynn.

We used the table, ladder and chairs to simulate a cliff for climbing. Dana also provides artificial support to make Chaoyue’s movement more shaky.

We used the table, ladder and chairs to simulate a cliff for climbing. Dana also provides artificial support to make Chaoyue’s movement more shaky.

The hand grabbing is very tricky. We have to be very careful to not cover the marker.

The hand grabbing is very tricky. We have to be very careful to not cover the marker.

Scene 2: Run and jump over

After realizing we were running out of time, we decided to do a short scene which is to just run and jump over something. We used the diagonal line to maximum the running distance. We have to ask the performers to run multiple times, to make sure their landing position is captured. It’s very easy to lose track when they are close to the edge.

Chaoyue and Lynn run and jump over stools.

Chaoyue and Lynn run and jump over stools.

Scene 3: Argument and kicking something

This scene works really well. The performers were actually arguing with each other. To make the take simple and short, Dana was sitting in front of the performers and clap to remind them engage the plot. The interaction looks super real, and the data is almost 100% perfect. It only took me 5 min to clean it.

Awesome acting! I wish we could capture their facial expression as well.

Awesome acting! I wish we could capture their facial expression as well.


This is the screenshot of scene 1’s data which literally took us 7 hours to clean it:

Because of the ghost markers and interaction between two performers, the data we captured has a lot of gaps and unlabeled markers.

Because of the ghost markers and interaction between two performers, the data we captured has a lot of gaps and unlabeled markers.

Retargeting

I created two new avatars for these three scenes. Originally we want to make them as two hikers. But I think if I make all these interactions happening in a farm would be funny.

Here is my avatar farmer created by MakeHuman:

I should have make the skin color darker. The default color of skin looks very pale in Unreal.

I should have make the skin color darker. The default color of skin looks very pale in Unreal.

Retargeting the avatars to the motion capture data is very tricky. I found it easier to retarget one avatar at a time. Because we rigged the avatars in Mixamo, all the hip bones are shared if we retarget both of them together.

Retargeting Chaoyue in Motion Builder.

Retargeting Chaoyue in Motion Builder.

Retargeting Lynn in Motion Builder.

Retargeting Lynn in Motion Builder.

3D animation in Unreal

When importing the fbx into Unreal, materials are often missing. I found it will work if I just import the retargeted animation with mesh. Everything will be neat and tidy in one place.

Here are my performers in Unreal! Man, woman, sheep, pig. What a paradise.

Here are my performers in Unreal! Man, woman, sheep, pig. What a paradise.

All done! Enjoy our final work:

Week 3: Data Cleaning and Retargeting

MOTION CAPTURE LAB DOCUMENTATION:

Project: Data Cleaning and Retargeting

Date: 2019.09.21 4 p.m.

Location: NYU Black Box Theatre

Participant: Yundi Jude Zhu, Chaoyue Huang, Ryan Grippi

Goals:

  • Pick a partner or two and sign up for time in the Black Box. Record a team member in mocap. Review the data for any gaps, and fix it. Take screenshots of the data, before and after (or give us the filepath to review), and export fbx files for retargeting.

  • Create an Avatar using MakeHuman, Fuse, or your software of choice (Bonus points for Tiltbrush, Medium, Blocks, or Quill). Retarget your cleaned data to the character and import into UE4 and place them in the world you’ve been working on. Record some video using Quicktime, your phone, Open Broadcaster, etc…

Steps:

  • Get motion capture record and clean the data

  • Make 3D model with MakeHuman

  • Get model rigged with Mixamo

  • Sync motion capture data with 3D model and export as .fbx

  • Use the data to make animation in Unreal

Motion Capture and Data Cleaning

Lynn makes a T-Pose to be captured by the 16 cameras.

Lynn makes a T-Pose to be captured by the 16 cameras.

Key notes:

  • We invited Lynn, a friend from NYU’s computer science program, to be the dancing model. She is a natural dancer! So good!

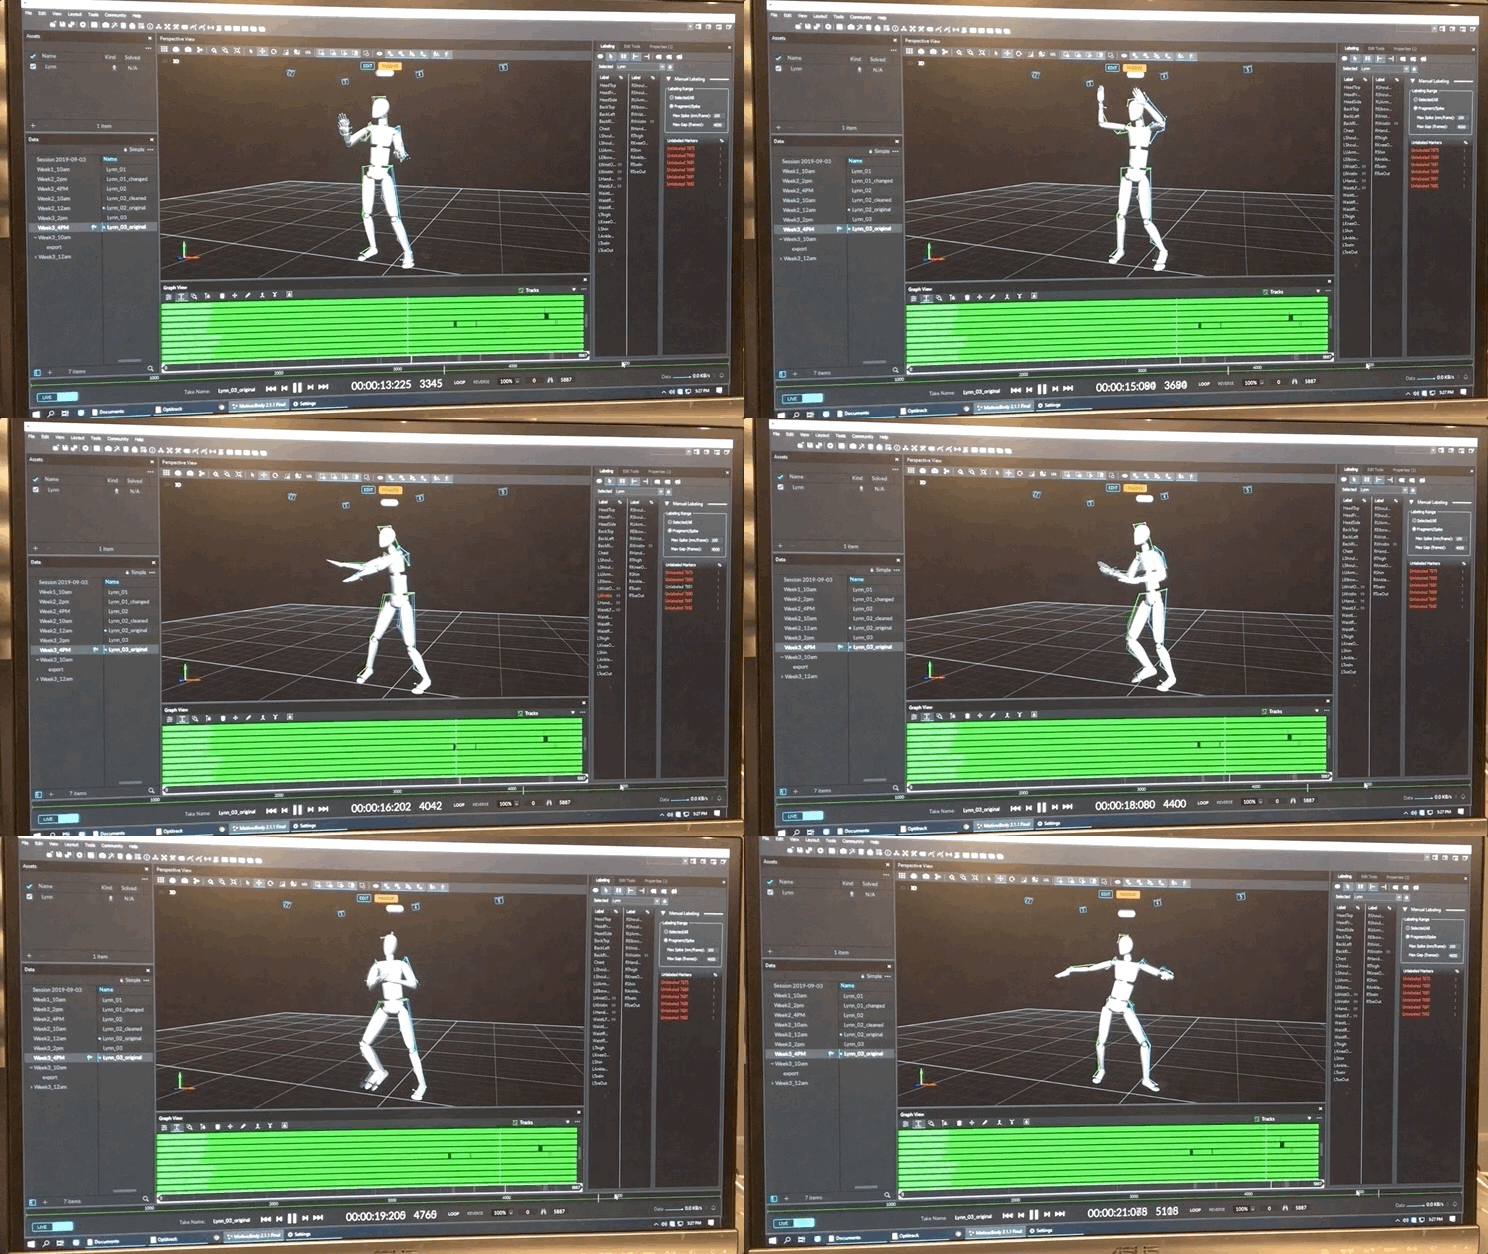
  • We took three takes and the data is surprisingly good. We didn’t get many untitled markers or missing gaps. Most of the unlabeled markers are ghost.

  • When cleaning the data, we did find out a hand was twisting weirdly. We tried out different ways to fix it. It turns out that the left hand wrist out might have been switched with left hand out for a few frames. We switched the two markers. Eventually, the movement looks much better with “smooth” button.

We captured surprisingly good data for the second take, which most markers are 99% good and only one unlabeled marker turns out to be a ghost.

We captured surprisingly good data for the second take, which most markers are 99% good and only one unlabeled marker turns out to be a ghost.

Lynn dances. The data is not bad. Most of the markers are 100% and only few unlabeled markers.

Lynn dances. The data is not bad. Most of the markers are 100% and only few unlabeled markers.

In the original take, the hand flipped weirdly.

In the original take, the hand flipped weirdly.

My phone was playing music for Lynn, so we didn’t capture a reference video for the take. We asked Lynn to flip her hand and see how we can fix it.

My phone was playing music for Lynn, so we didn’t capture a reference video for the take. We asked Lynn to flip her hand and see how we can fix it.

It turns out that the left hand wrist out might have been switched with left hand out for a few frames. We switched the two markers and make it smooth. It turns out great.

It turns out that the left hand wrist out might have been switched with left hand out for a few frames. We switched the two markers and make it smooth. It turns out great.

Making 3D Model and Retargeting

Key notes:

  • I created multiple models with MakeHuman. I downloaded 1.1.1 version for my Mac but there was no option for clothing. Then I downloaded the test version for a PC.

  • Our team had trouble when inputing motion capture data into Motion Builder. The animation was not playing. Thanks to Chaoyue, we booked another studio hour to get the files exported right. It should be .fbx files only.

  • The retargeting process is really straight forward. Mixamo for plotting skeleton and Motion Builder for syncing the motion capture data with the model.

  • In all the process of retargeting, the files should be .fbx. Make sure to rename the different .fbx files to make it organized.

Making randomized human. MakeHuman is very disturbing…It’s super stereotyped, and I feel bad using sliders to control the appearance.

Making randomized human. MakeHuman is very disturbing…It’s super stereotyped, and I feel bad using sliders to control the appearance.

Plotting skeleton into the model I made with MakeHuman on Mixamo.

Plotting skeleton into the model I made with MakeHuman on Mixamo.

My 3D baby is alive!

My 3D baby is alive!

Super proud moment when the baby starts to dance along with Lynn in Motion Builder.

Super proud moment when the baby starts to dance along with Lynn in Motion Builder.

Making Music Video in Unreal

I created four models in total to test out the virtual dance.

Here is the ugly baby dance:

Then I imported three different models to play three different animation. I also played around with the models’ material to make it surreal.

Here is the creepy group dance:

Week 2: Human Forms

For my first Unreal scene, I built a golden robot king, and the landscape becomes its cloak. I used plant tool to create countless windows to make it feels like flying.

HighresScreenshot00003.png
HighresScreenshot00000.png
HighresScreenshot00002.png

MOTION CAPTURE LAB DOCUMENTATION:

Project: Calibration and Rigid body Lab

Date: 2019.09.14 4 p.m.

Location: NYU Black Box Theatre

Participant: Yundi Jude Zhu, Dana Elkis, Mingna Li, Calvin Shiwei Lee

Goals:

  • Take a video of the team member in mocap and their data.  Make sure you save your projects and your takes. You will be using this data next week.

  • Things to think about:

    • What actions don’t work in the space?

    • How can you use rigid bodies and full body tracking?

    • Try “breaking” the body in different ways

    • Try moving around markers while the body is tracking

Steps:

  • Get model dressed with all the markers

  • Set up skeleton

  • Output to Unreal

  • Record body movement and collect data

Dressing

Key notes:

  • There are 37 markers per person. A reference can be found in the Motive.

  • Make sure the model is in T-pose, and look for all the bones and key spots.

  • The markers don’t have to be symmetrical. The goal is to let the software recognize the 37 markers at the same time.

This is me getting dressed by Mingna Li. The screen shows the software successfully captured 37 markers.

This is me getting dressed by Mingna Li. The screen shows the software successfully captured 37 markers.

Select all the markers and the cameras are able to capture a human shape

Select all the markers and the cameras are able to capture a human shape

Ready, Action, Cut

Key notes:

  • When setting up the skeleton, there should be only one actor/actress in the room.

  • Set different colors for each model so it’s easier to know who is whom.

  • Be careful don’t drop any marker during the performance. The human shape may be collapsed if any marker is gone or covered.

  • We created a rigid body to be the camera, and using the stick to be the shoulder rig.

We did a music video with live output data in Unreal.

We did a music video with live output data in Unreal.

We also made an action movie.

We also made an action movie.

We also did first-person perspective shots.

We also did first-person perspective shots.

Of course there was accident. When Calvin was doing a super fancy spinning kick, he accidentally kicked off the “camera”. But the good news is, we are Motion Capturing in Unreal world! Camera is fine!

Of course there was accident. When Calvin was doing a super fancy spinning kick, he accidentally kicked off the “camera”. But the good news is, we are Motion Capturing in Unreal world! Camera is fine!

We used the ladders to create an in-air slow motion shots. Super cool!

We used the ladders to create an in-air slow motion shots. Super cool!

The slow motion shot of me drawing swords.

The slow motion shot of me drawing swords.

Danna did a lower angle shot of me flying in the air. Dope!

Danna did a lower angle shot of me flying in the air. Dope!

Of course, we did virtual selfie.

Of course, we did virtual selfie.

When taking off the markers, we found out that funny gestures will happen to the models in Unreal. The markers on Calvin’s legs and ankles were removed, and his avatar was spinning in the air with weird legs. We had so much fun.

When taking off the markers, we found out that funny gestures will happen to the models in Unreal. The markers on Calvin’s legs and ankles were removed, and his avatar was spinning in the air with weird legs. We had so much fun.

Summary

  • Be careful to make sure all the 37 markers are in right place, and no missing marker when making movements.

  • Making movement in suits is very hot and sweaty. Make sure bring them to the laundry when finished everything.

  • Things to think about:

    • What actions don’t work in the space?

      • Too rapid movements that will get rid off the markers

    • How can you use rigid bodies and full body tracking?

      • Rigid bodies can be virtual camera, and the full body can make all the gestures. We are missing facial recognition at this point.

    • Try “breaking” the body in different ways

      • Just take off the markers and funny things will happen.

    • Try moving around markers while the body is tracking

      • The avatars will show strange things. Like the ankles might be in reverse if I twist the suit.

Week 1: Calibration and Rigid body Lab

Motion capture LAB documentation:

Project: Calibration and Rigid body Lab

Date: 2019.09.07 4 p.m.

Location: NYU Black Box Theatre

Participant: Yundi Jude Zhu, Qiushi Lin, Ryan Grippi

Goals:

  • Calibrate the room and create rigid bodies with unique names.

  • Things to try out:

    • What kind of objects track well?

    • What different scenarios cause occlusion?

    • Make a new rigid body with a prop in the room!

    • Can you make a person out of rigid bodies?

    • Can you act out a scene with only objects?

Steps:

  • Use Motive to collect live motion capture data

  • Use wand to calibrate the space

  • Set the ground

  • Create rigid bodies

  • Record body movement and collect data

  • Live data output to Unreal

Calibration

Key notes:

OK, this is a wrong demonstration of wanding. The movement should be slow and try to cover as much area as possible.

OK, this is a wrong demonstration of wanding. The movement should be slow and try to cover as much area as possible.

  • Use the Motive to capture live data. Motive is very straightforward and user friendly. Just complete the upper right four icons to finish the process.

  • Mask out all the lights: basically just to make a mask like in Photoshop. Make mask visible to automatically ignore some irrelevant shiny dots. So that the canvas is neat and tidy, and only the markers are being captured.

  • When wanding the space, try to cover all the latitude and longitude of the space to make sure at list 10,000 samples are captured from each Camera. The more samples the better result. If a camera is not capturing enough samples, hit the frame of the camera will highlight the actual camera (yellow lights), and the wander can walk to that camera and do more wanding movement. The movement should be like slowly brushing the walls, or wiping cream on a cake. Be careful the T-Wand is super expensive and should be only held either in our hands or on the hook.

  • Calculation: When all the cameras have collect more than 10,000 samples, hit the “calculation” button to calculate the space. Wait for about a minute or two and if it shows “exceptional” then we are done!

  • Set the ground: After the calculation, the software will generate a virtual space without a sense of plane. So we need to use the L-shape calibration tool to set up the plane. Make sure the “z” is pointing to the director/performer/audience. It should be facing the center of the stage. After that, all the 16 cameras will know where the ground is. Make sure the L-shape calibration tool is safe and back in closet.

  • To save the ground means to create a project. Save it properly on D Drive (not c drive) with a legit name.

Calibrating the space

Calibrating the space

Rigid Body

Key notes:

  • A rigid body consists of at least three markers. Four is the best. Because sometimes one of the markers may be covered during movement. If the marker is less than three, the rigid body will collapse and lose signal.

  • The Black Box theatre can contain about 25 rigid bodies at the same time.

  • After setting up the assets with at least three markers, use the mouse to select all the markers and right click to create a rigid body from selected markers. On the right panel, we can name the rigid body and change their features.

  • The middle yellow dot is called centroid. It’s the core of the rigid body.

This is the very first magical moment in Motion Capture when select all the cameras eye on the selected markers. Screenshot courtesy of OptiTrack

This is the very first magical moment in Motion Capture when select all the cameras eye on the selected markers. Screenshot courtesy of OptiTrack

Rigid body number 1!

Rigid body number 1!

Recording movement

Key notes:

  • When the rigid bodies are all set, hit the record button to record the movement. Motive is very straightforward like any video recording and editing software. Ready, Action, Cut.

  • Always have two takes in hand. One is the best performance. One is the best data. It’s all about data eventually. We need to make sure the data is easy to read and shows clearly what the movement it. Make sure all the markers are fixed and steady.

Data streaming

Key notes:

  • Unreal uses the same IP address with Motive, so that we can see live data output being transfered into 3D models.

  • In Motive, click on the rigid body to see “Streaming ID”; in Unreal, type in the streaming ID to live transfer datas into 3D models.

  • Always make sure that the markers are visible and never moved.

My experience

  • In this lab session, I created four rigid bodies with: stick, chair, tennis ball, and a plate.

  • I make a lot of videos for my full-time job. So the first idea came to my mind is to make a rigid body that can become a handy video camera in the virtual space. Firstly, I tried out the stick. It’s light and very straight. I put three markers on the top, the middle and the end. Each marker is on different side of the stick, so that I can also get the diameter of the stick. When output the data to Unreal, the stick rigid body makes a very handy video camera that I can hold on each side with two hands and do steady horizontal movement, up and down, and slider movement. When pushing up the stick, I found the hidden upper floor with all the golden gems that has gravity!

  • Later on, our team thought the chair with wheels will make a much more steady video camera that can do all the follow up shots. In the beginning, we put three markers on the chair, but one of the markers keeps falling to the ground and we lost track of the rigid body. That’s how I learned four is a better number. When data streaming with Unreal, one of team member was sitting on the chair and his body covered a marker, which also destroyed the rigid body. Thanks to the chair, I learned a lot about rigid body and streaming ID.

  • After this, we tried to make a first person shooting game with three rigid bodies. We put three markers on a tennis ball, which is also very easy to lose track because holding the ball with hand will accidentally cover one of the markers. We tried to use the chair as the camera, and make the stick and ball into 3D balls. Later, we changed the tennis ball into a box cover. The plate-shaped cover is flat and became a much steady rigid body to handle.

I created my first rigid body with three markers on a stick.

I created my first rigid body with three markers on a stick.

Super handy and steady video camera from the stick rigid body

Super handy and steady video camera from the stick rigid body

The stick camera can also make super cool camera rotation and transitions for cinematography and video editing.

The stick camera can also make super cool camera rotation and transitions for cinematography and video editing.

Of course the stick rigid body can also become a fancy weapon.

Of course the stick rigid body can also become a fancy weapon.

Fancy weapon!

Fancy weapon!

The rigid body chair. In a test run, we accidentally sit on one of the markers and the chair was lost track…

The rigid body chair. In a test run, we accidentally sit on one of the markers and the chair was lost track…

We also tried to combine two rigid bodies together. If we use the chair as the camera and the stick as an object. Then we will get a steady shot of first person perspective. Super cool!!!!

We also tried to combine two rigid bodies together. If we use the chair as the camera and the stick as an object. Then we will get a steady shot of first person perspective. Super cool!!!!

We changed the tennis ball into a plate, which is a much more steady rigid body!

We changed the tennis ball into a plate, which is a much more steady rigid body!

Summary

I had a lot of fun in the Black Box. When creating the rigid body, it’s important to think the final shape and movement of the virtual object. Sometimes it’s unnecessary to make a fancy rigid body. The rigid body doesn’t have to be look alike the final model. Just think about the core movement of the object, a simple stick can become anything.

What kind of objects track well?

Simple, flat objects with fixed markers that won’t easily fall apart.

What different scenarios cause occlusion?

Missing markers.

Make a new rigid body with a prop in the room!

We tried out stick, chair, tennis ball, and a plate.

Can you make a person out of rigid bodies?

Originally I think I need to put the markers on myself. Later on, I realize a stick itself can become a person, depends on what kind of movement you want the person to make.

Can you act out a scene with only objects?

We made a first perspective shooting game.